
Here's today's project: A Star-Spangled Windsock
Materials:
Construction Paper (We used cardstock because it was on hand)
-Here are the sizes we used. You can use any size you'd like, but make sure it's big enough to make into a cylinder shape.
*White- 8.5in x 20in, plus extra for the stars
*Red- 10in x 4.5in, cut into 4.5in x 1.5in strips
*Blue- 4.25in x 20in
Glue or tape
Pencil
Stapler
Scissors or paper trimmer
Streamers, cut into 12-14in lengths
Hole Punch
String
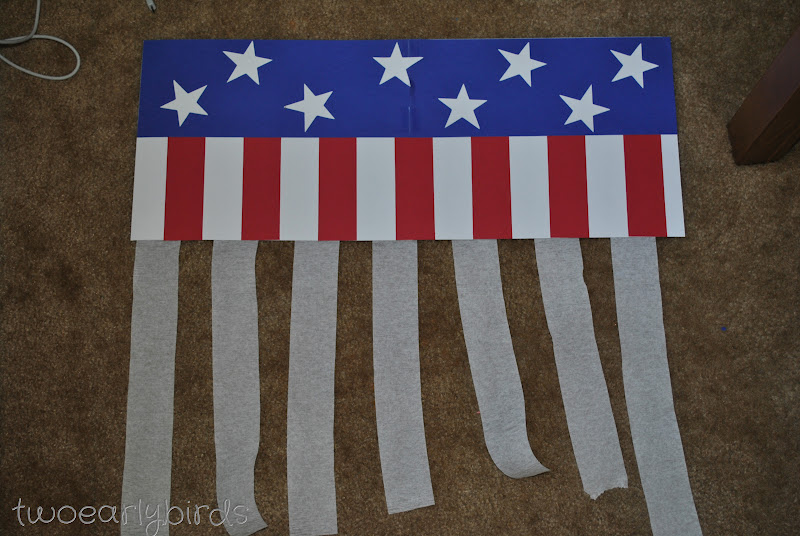
Step One: Stripes
Glue the red strips to one long edge of the white paper. (We like to keep things pretty uniform, so we used other strips to keep the white spaces the same size. Since children will be making these, chances are the spacing won't be as precise, which is just fine!)

Glue the blue strip to the other long edge of the white paper.(We made the red strips longer so the blue would overlap. This is ok! It will look neater that way.)

Using the star template below, or your own pattern, trace 8-10 stars on white paper. Adults may need to help younger children getting to the inner points of the stars. Once they are traced and cut, glue the stars to the blue section of the windsock.

Step Four: Streamers
Flip paper over. Using tape, attach the streamers to the plain white side. (Using tape will help avoid the streamers from tearing when the children use too much glue!)
Now it's time to make the windsock round. A stapler will come in especially handy here. The glue did not want to stick the papers together very well. It is heavily reinforced with tape. Double sided tape would probably work best. An adult should use the stapler. We don't want any small fingers getting in the way.
(Funny story side note: During the move, the stapler and staple remover both made it. The box of staples, however, did not.)

Step Six: Adding String and Hanging Up
Punch two holes on opposite sides of the windsock. Thread string through both holes and tie a knot so it doesn't fall when it's hung up. Voila! You have a nice decoration that kids of any age can make!
Here is a star template for you to use. Of course you may use any star you like. We actually used the star from Plantin Schoolbook and our Cricut. (Those inner corners are sometimes hard for us, too!) Ours were about 2 inches, but again, you can make yours any size you'd like.

Today's Party Trivia:
- Mount St. Helen's erupted in 1980. It killed 57 people. (If you ever get the chance to go, it's definitely something worth checking out.)
-In 1860, Abraham Lincoln won the Republican nomination for President.
- Today in International Museum Day.
No comments:
Post a Comment